I have had a meaningful relationship with the 1911-type .45 ACP for forty years now. It was – almost but not quite – the first centre fire handgun I ever owned, and long before that I remember a regular fixture in my parents’ room at bedtime was my father’s Remington Rand .45 on the nightstand. That was back in the ‘60s, and Col Jeff Cooper was making his mark on the gun world. My Dad’s .45 lived in Condition 1 – cocked and locked. I never asked him about that, because it was just the way it was, but I’m pretty sure he wouldn’t have known Col Cooper from Col Sanders. He’d picked up Condition 1 at some time in the same place he picked up the pistol, which was the US Navy during the Second World War. It would be a decade and a half before I bought my first .45, a Colt Government Model MKIV Series 70. By then my father had passed on, and my friends and I were keen followers of Col Cooper’s doctrine and the emerging sport of practical shooting. Real practical shooting, not the action discipline it has become.
In 1978, just before I emigrated to Rhodesia I met a fellow by the name of Mike Large, who was then living in Nevada. Mike had been in the Rhodesian Army, and later the Prison Service, and was one of the founding fathers of Practical Pistol in Rhodesia. Here was a guy from half a world away, in my home town, who’d actually shot against Jeff Cooper and beaten him. Mike’s forte was the Browning Hi-Power, but we spent a lot of range time breaking in my new .45, and it was Mike who got me out of the “gravel pit” mentality of shooting at tin cans, and into some proper training routines.

It was around about this time that I learned how much consumer tolerance was associated with the 1911. Very few products seem to take so much fiddling with to get just right. I owned two at the time – that old .45 and a Jeep CJ-5. There were no Kimbers or Les Baers or Para Ordnances back then, and folks like Bill Wilson made their living by customising Colt 1911s. Now, myriad manufacturers build their own, “new and improved”, but I’ve always preferred to get a basic Colt, and build it up my way. I once pulled out all the stops in Zimbabwe to get my hands on a stainless steel compact .45 from Schutzen Arms that came ready-fitted with all the bells and whistles. It never did work right, though it wasn’t the manufacturer’s fault because it had left the factory as parts, and they did provide me with excellent backup service trying to get it to work. I tried to shoot the local Practical Pistol circuit with it, but after it fell apart at the national championships one year I bought a first generation Glock. In .45, of course. It’s worth mentioning that a local gunsmith finally got it 100%, and it’s now a good friend’s EDC.

Those were the days before IPSC consisted of as many divisions as it does now, and I finally had a high-capacity, major calibre handgun. Say what you will about “Tupperware”, but that Glock .45 and the .40S&W I later replaced it with served me well for many years. They were reliable, and for my money are excellent duty sidearms.
Then, early into the new millennium, 2003-2004, I did some contract work in Iraq. There I was issued with the Beretta M9. Again, I will speak no evil of it, for though I only ever fired it on the range it did all that was expected of it.
But it was while I was in the Sandbox that Obi-Wan Kenobi began speaking to me. Over and over. “An elegant weapon, for a more civilised age”. I instinctively knew he wasn’t talking about either the Glock or the Beretta. One thing every AAFES base exchange in Iraq had was a good supply of gun magazines. When I had some down time I began to fantasize. I was going to build another 1911 .45 when I got back, but this one would have a theme. I would put nothing on it that I couldn’t have put on my original Colt .45 back in the late 1970s. And of course, it would be a Colt. MKIV, S70 if possible.
When I got back to Zimbabwe I bought a Glock .40.
And then came the impetus I needed. 2011. The hundredth anniversary of the adoption of John Moses Browning’s iconic masterpiece by the US government. It was truly a case of natural selection, for by then IPSC’s concept of a Classic division for single-stack pistols was being discussed at an advanced stage, and the other criterion – that I could compete with what I carried – was on the horizon.

Almost as if by providence a Colt MMKIV Series 70 fell into my hands. Literally. “Here, you want this? I’m leaving the country”.
So, I cast my mind back to 1977 and my original Colt. The first thing to do was to make a list of what I really needed on the gun, and another list of what I really wanted. I had to bear in mind what the IPSC rule book would mandate, and to play by the rules I’d set for myself I got some old copies of American Handgunner from back in the day, and completed my lists based on what would have been available to me back then. So, what this is really all about is what I believe I should have on a 1911, and why.
The first thing I did was strip the Colt down to bare bones. My good friend Detective Superintendent Charlie Haley had many years ago given me a jar of Parker Hale’s fine Motty Rifle Paste. Few shooters today have probably ever heard of Motty’s Paste, but it was a form of jeweller’s paste that was made to remove nickel deposits. The container and label alone are worth having. I caked the slide and frame in Motty’s Paste and spent the better part of a day just working the bearing surfaces while watching TV. I then handed the frame over to my gunsmith to put a rounded bevel on the base of the magazine well.
Zimbabwe by then having become something of a pariah nation, I sent my shopping list for bits and pieces across to the ‘States with various professional hunters who were going to the SHOT show and who were able to smuggle back what I wanted. I fell back on my tried and true for most of the stuff, and bought Wilson Combat parts.
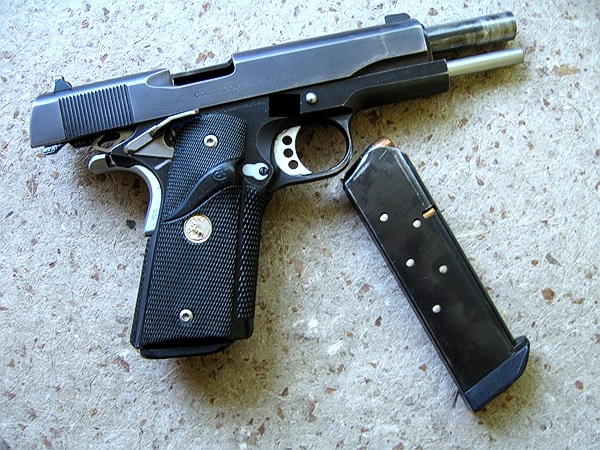
Now, for what and why. There are really only two modifications an older Colt really needs – a good set of sights and a decent trigger. Back in the day, the vogue was to mill out the Colt’s slide and fit a Smith && Wesson revolver sight in the rear. Figuring I would develop a load and stick with it, I opted instead for a high profile set of fixed iron sights. Black, no dots or other distractions. I remembered reading decades ago that Chuck Taylor recommended iron sights with about 1/8” visibility on either side, and I selected a set that looked about that to me. They were marketed as “retro” sights, but I suppose that fits. (After the foresight went AWOL one day, I had the slide machined and fitted a dovetailed STI replacement, which worked perfectly with the existing rear sight.) I went with the iconic three-hole Wilson extended aluminium trigger with the set screw to obviate overtravel. Maybe cheating a little on the whole 1970s thing, I got my dream trigger by dropping in a computer-prepped hammer and sear set.
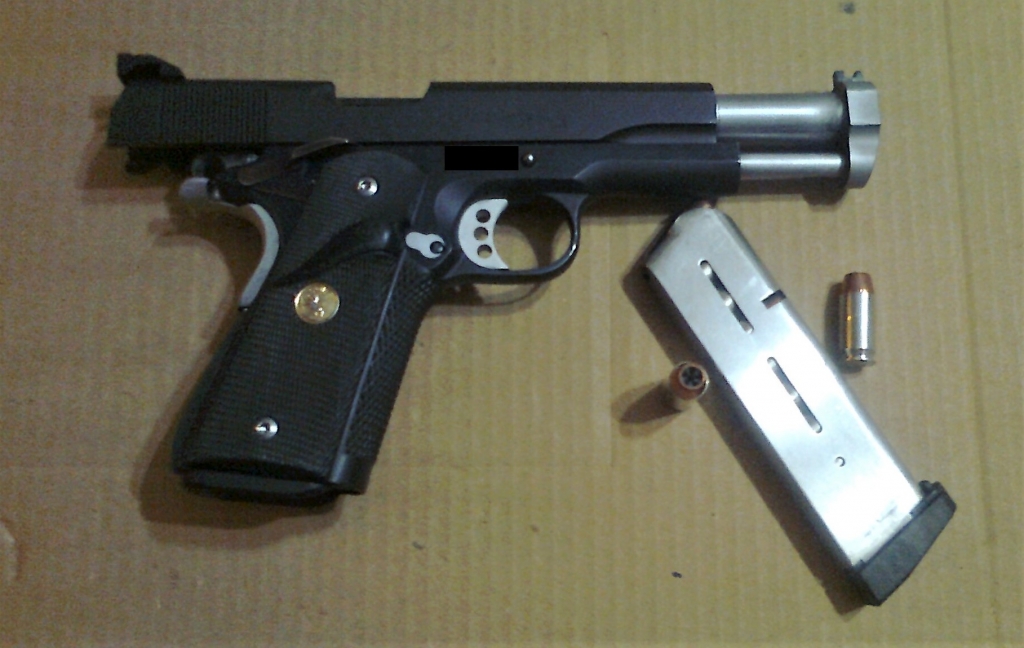
In my personal case two other mods were necessary – an ambidextrous safety as I shoot a handgun as a southpaw, and an extended magazine release for the same reason – I drop my mags with my trigger finger. The safety was a departure from my Wilson Combat theme because Ed Brown’s is pretty much state-of-the-art, and I had the magazine release built up by way of extending it, rather than fit a button with a wider diameter. The idea was to drop the mag when I wanted to.
I then replaced the extractor and all the springs, which I think is a sort of must-do in any gun of unknown history, and even though this particular model hadn’t seemed to deform many cartridge cases on ejection, I had my ‘smith relieve and re-shape the ejection port.

Now, for what I wanted. I much prefer the flat mainspring housing to the arched one, and as I bought a Pachmayr one, I put their fine grips on, too. I have never owned a .45 without Pachmayrs. My gunsmith fitted an extended ejector, which we tuned with a diamond file until it worked flawlessly. That took a couple of hours. Even though I had bevelled the magazine well, ala back in the day, I fitted one of the plastic mag funnels that hooks on the bottom grip screw bushings. I just plain like a Commander-style hammer, and I confess I cheated a little here, too, with a jaunty squared STI hammer. And lastly, a beavertail grip safety. Now, I don’t like most beavertails. But I came across one that was a bit of a conundrum. It was downswept. It gave me a higher grip, and it looked nice. To me, anyway. I have seen them over the years, but I have no clue who makes them. I posted photos on a couple of forums and someone suggested it might have been made by the now-defunct King’s Gun Works.
I now had a beautiful, retro Colt 1911. To be fair, there wasn’t a lot of competition in Zimbabwe in the new IPSC division, but that gun won me the Classic Division national titles in 2012, 2013 and 2014.
Then came 2019, the year of the Frankengun. Like its literary predecessor, a Frankengun is assembled from random parts acquired from random sources, albeit without the need for a hunchbacked grave robber. The Frankengun won’t be a Bill Wilson custom piece, and it will possibly – depending on how many years you’ve been shooting 1911s – cost as much or more than a Rock Island, but it can be a whole lot of fun to build.
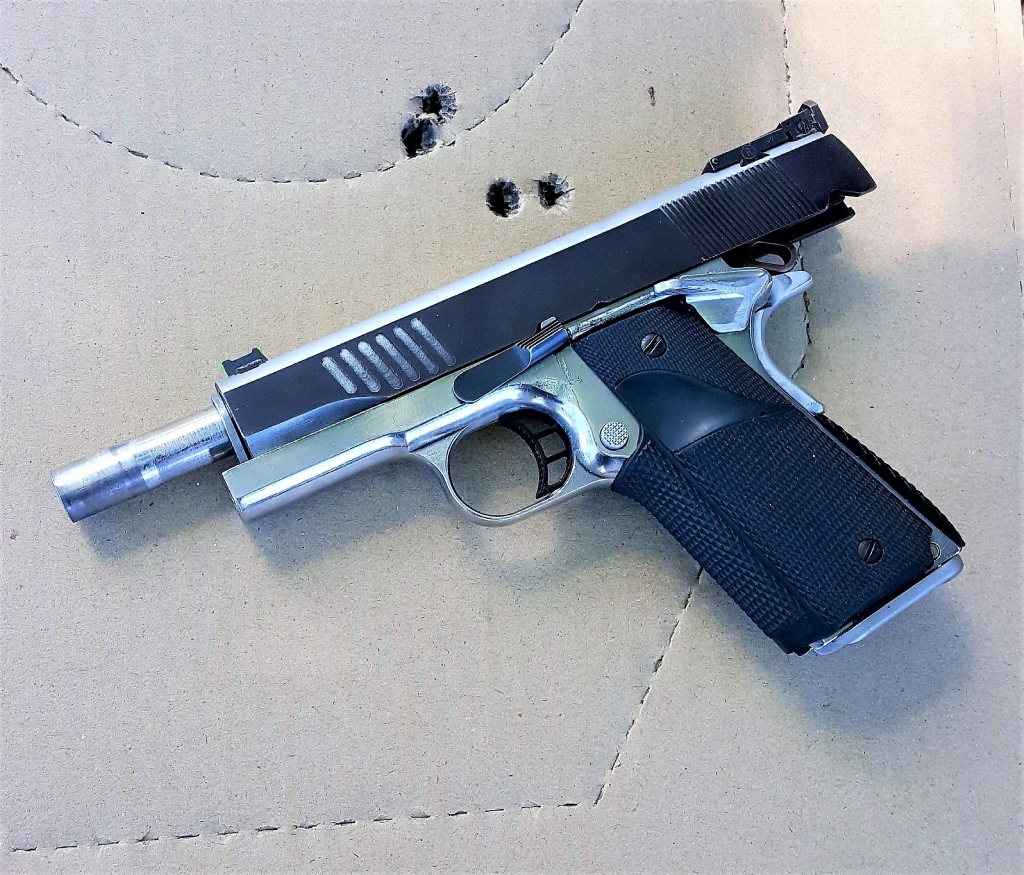
The Frankengun in question here is a 1911 in .45ACP – pretty traditional. It’s my ninth 1911, but it’s the first one I’ve built from scratch. It’s now my primary range gun as well as my carry gun. The whole idea began to germinate when a friend of mine offered me a stainless-steel Essex Arms frame. Then I called a couple of friends who were competitive shooters and went through my own bits and pieces, and found that I just about had a .45. As I started assembling it I started chopping and changing various parts – I mean, really, what 1911 is ever no longer a work in progress? I honestly doubt that the four grip screws came off of the same gun.
Once the gun was assembled, it was time to perform the safety checks:
- Thumb safety. Cock the hammer, engage the thumb safety, pull the trigger and release it. The hammer must not move when the trigger is pulled. Now hold the pistol close to your ear and pull the hammer back slightly while listening carefully. If there is an audible click, the thumb safety failed to prevent the sear from moving when you pulled the trigger, and the sear partially disengaged from the hammer hooks. The hammer, also, must not move when you disengage the safety. If the gun fails any of these checks, the safety, sear, disconnector and hammer may have to be replaced.
- Grip safety. Cock the pistol, and pull the trigger with the thumb safety off, and not depressing the grip safety. The hammer should not fall. With the pistol close to your ear, repeat the “click” test from (1).
- Disconnector. Cock the hammer and press the muzzle against a hard surface, pushing the muzzle rearward, which forces the gun out of battery. In this position, press and hold the trigger. The hammer should not fall. Then release the pressure on the muzzle so the slide returns into battery. Slowly release the trigger. The click you hear tells you that the disconnector is re-engaging the sear. If you pull the trigger again, the hammer should fall.
- Hammer hooks. With the slide locked open, drop it by depressing the slide stop. The hammer should not fall. Note, I do not perform this test each time I field strip my pistol – it is extremely hard on the gun.
I shouldn’t have to mention, but I will anyway, that these tests should be performed with due diligence as far as muzzle consciousness is concerned, and with no live ammo in the room.
I put together a couple hundred rounds of ammo, using Winchester Large Pistol primers, 6.0gr of MP200, and a 230gr Frontier CMJ round nosed bullet seated to 1.260”. My magazines were as mix-and-match as the gun, and I had to toss a couple of them, but, while no tack-driver, my Frankengun could shoot “minute of A Zone” comfortably at 25m, and experienced no feeding or ejection issues whatsoever in those first 200 rounds.
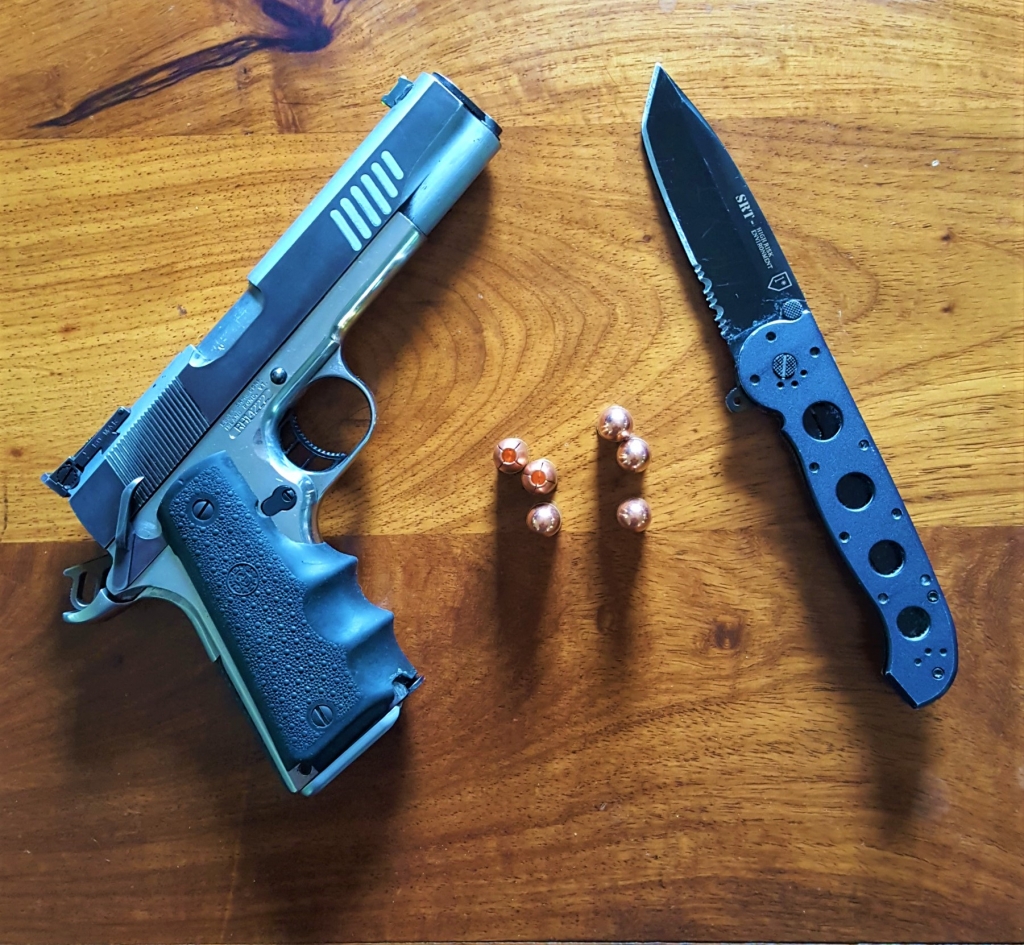
All of the parts for the project gun were used, except for the springs. Owing to the generosity of a number of good friends, this project cost me $0.00, excluding springs. And I’ve had a lot of fun.
Like Obi-Wan said, an elegant weapon, for a more civilised age

Leave a Reply
Want to join the discussion?Feel free to contribute!